

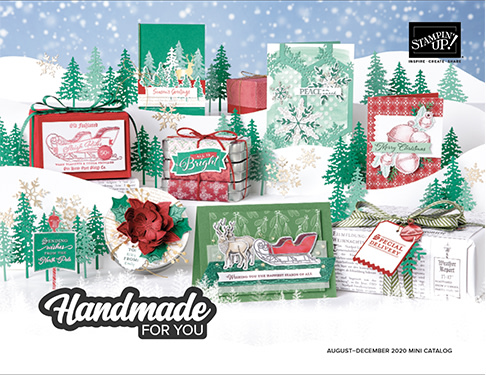
Stampin’ Up! has released the list of retiring products and many
Last Chance Products are on sale!
Now is the time to get those items off your wish list
order before they are gone.
My Top 5 Retirement List Tips:
1) In Colors: All 2019-2021 In Color inks, paper, and embellishments are retiring. These items usually sell out quickly so don’t forget to add ink refills and extra cardstock for your craft stash. You don’t want to miss having these gorgeous colors in your collection!
2) Stamps vs. Accessories: Retiring stamps are available through May 3rd. All other retiring items such as; bundles, paper, embellishments, dies are only available while supplies last, so you don’t want to wait and miss out.
3) Bundles: Bundles, with their 10% savings, all retire! Even if the bundle items carryover to the next catalog the discount does not so save on bundles while you can. Bundles are only available while supplies last.
4) Online Ordering: Your best bet for grabbing items before they sell out is to order online! I’m always happy to help and place orders for you, but the delay could mean items you want won’t be available.
5) Host Rewards: Exclusive Host Reward stamp sets also retire. If your order qualifies for host rewards, you may want to select those stamps. You can also apply your Host Rewards to the cost of your Starter Kit. When you join between April 1 and May 3 you get early access to add new 2021-2022 Annual Catalog preorder items in your Starter Kit!
I pray you will stay safe and be well!
And As Always…
Make someone smile today.
Give the gift of something handmade and heartfelt!
Inky OXOX,
Jayne
New HOST CODE HDPUSNPH
Thanks for using the Host code for your online order.
If your order is $150 before tax and shipping do not use the host code, you will earn free Stampin’ Up product.
I have a Stampin’ Up Store where you can purchase Stampin’ Up products 24/7.
I value your business, my clients mean the world to me, most are dear friends.


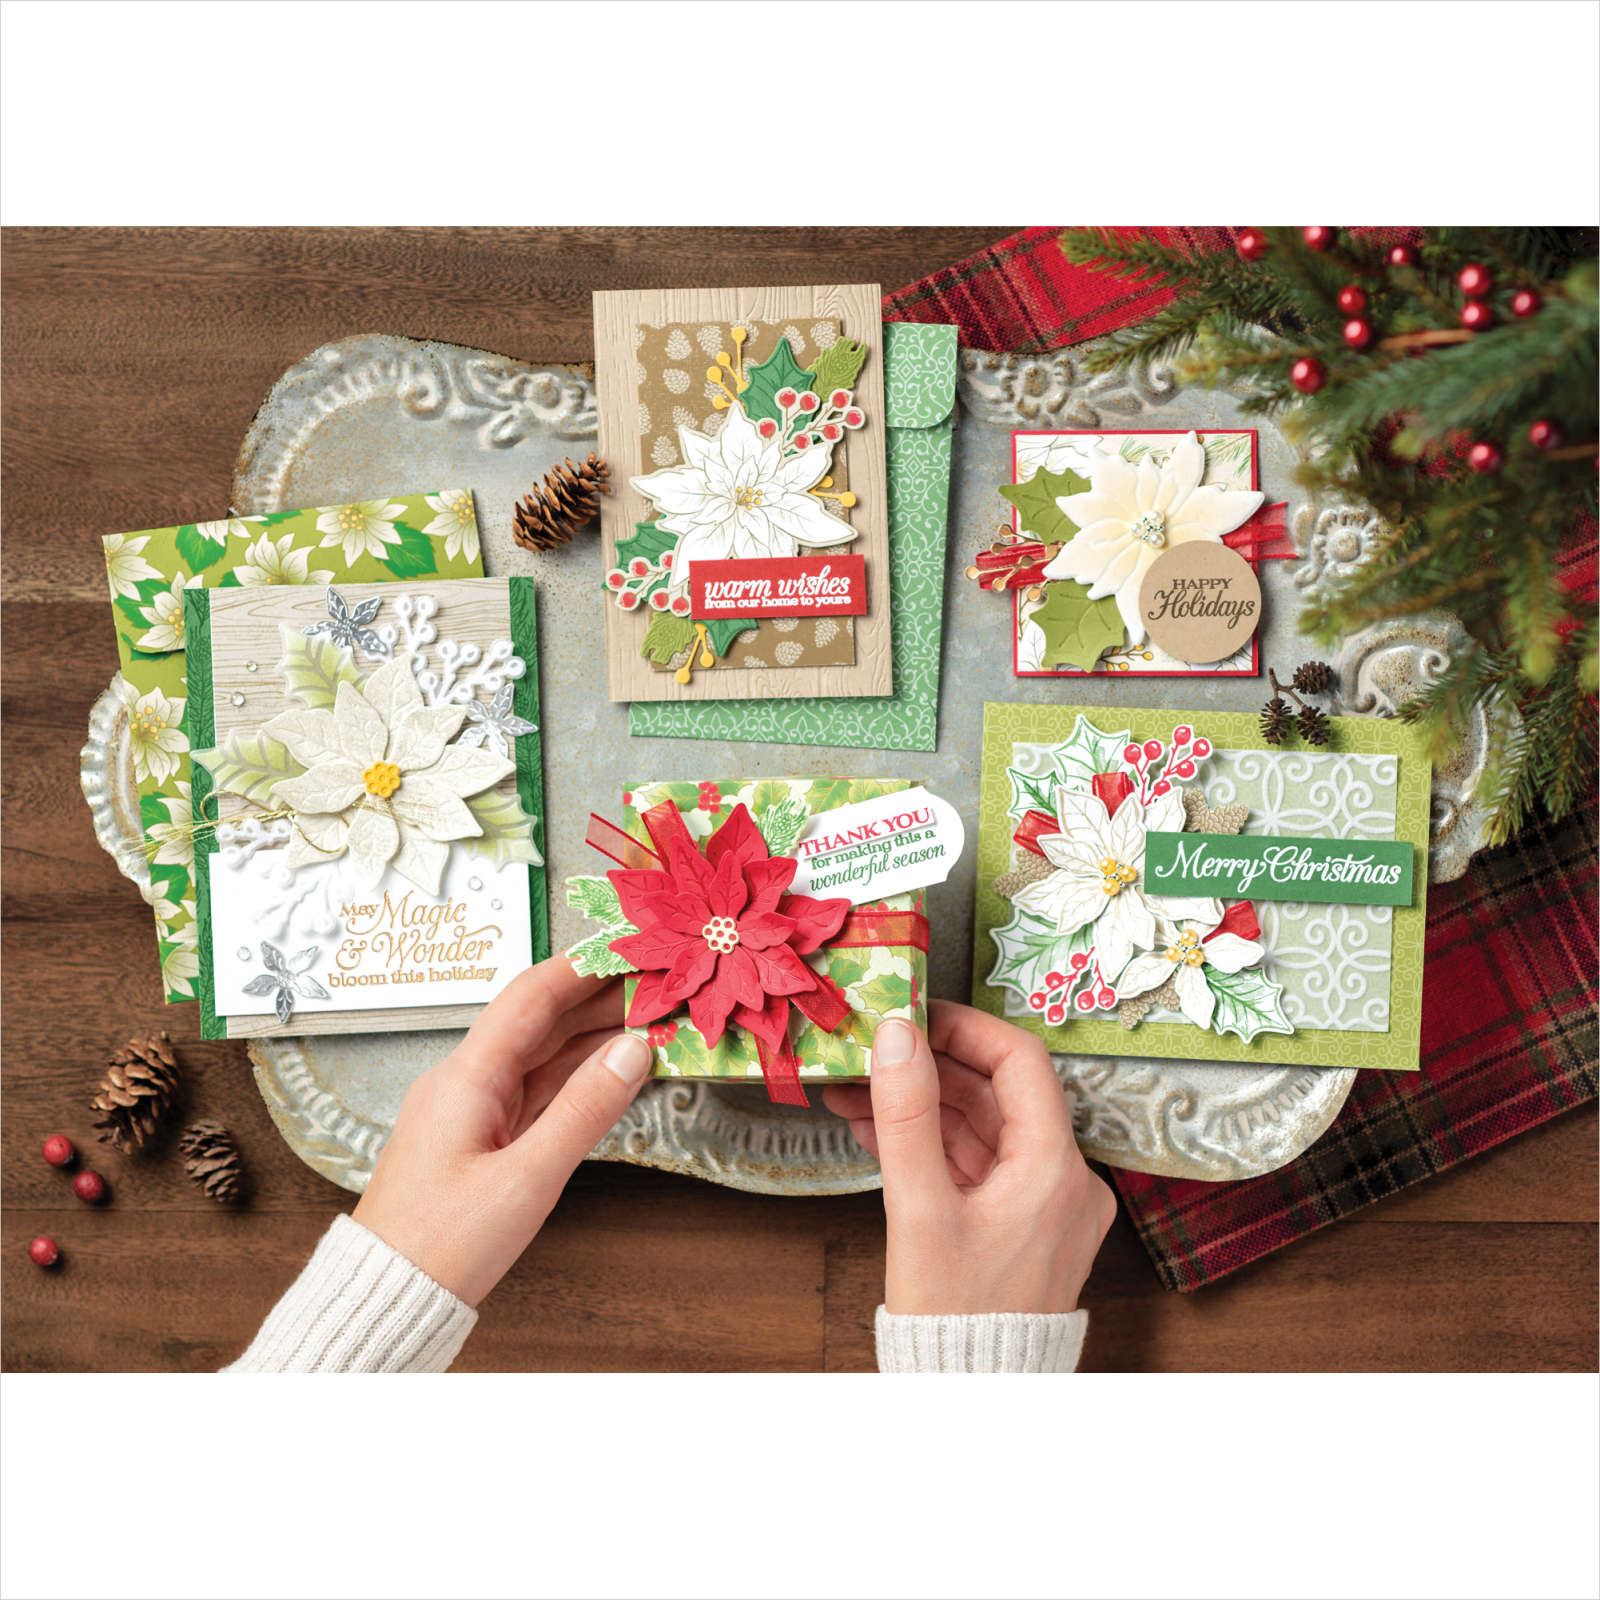


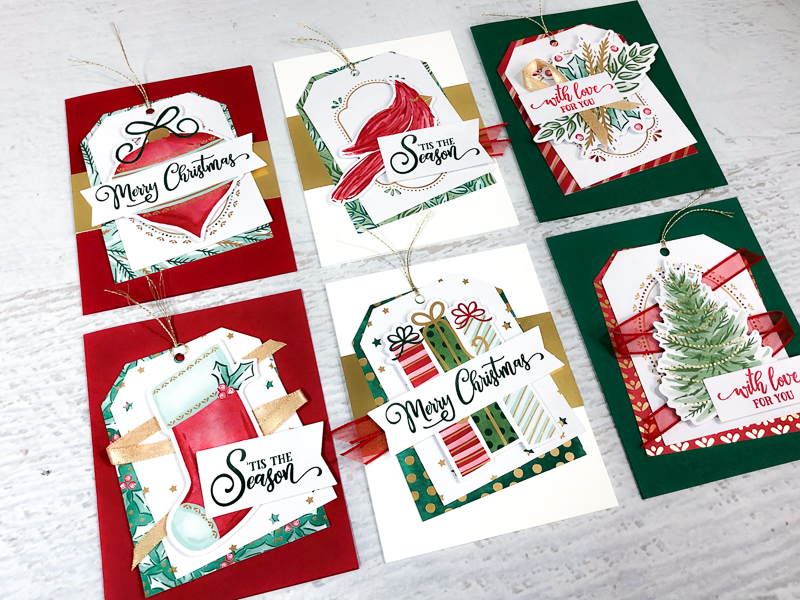 It’s always fun to take something and re-purpose it to something else. The Tag Buffet Project Kit is ideal for this. This kit is an awesome value, it includes 30 tags, 5 each of 6 designs and a sturdy designer box for storing or gifting. These tags are big, detailed, and have gold foil accents, which makes them perfect for converting them into the focal point on cards.
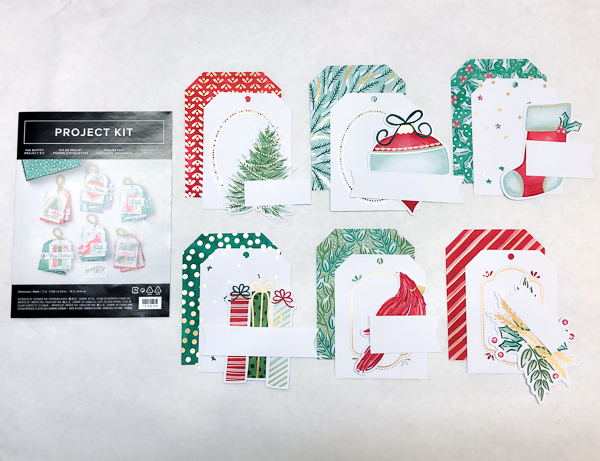 1. Sort Tag PiecesSort out your Tag Buffet tag, image, and label pieces just like is shown in the instructions included with the kit. Supplies listed above are for 6 cards, if you want to make more just add up the supplies.
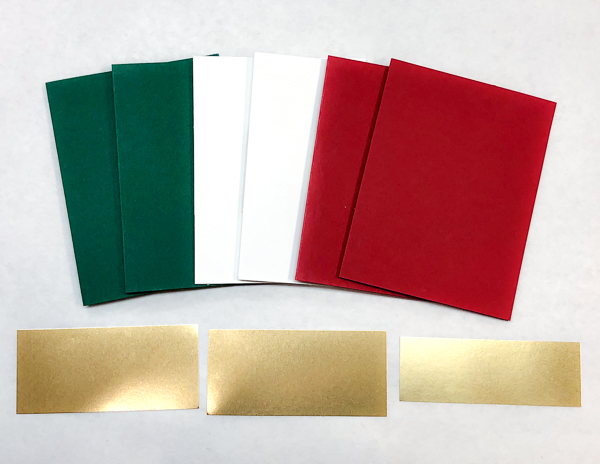 2. Cut & ScoreCut two 5-1/2″ x 8-1/2″ card bases each from Real Red, Shaded Spruce, and Thick Whisper White cardstock. Score each at 4-1/4″ along the 8-1/2″ side. Cut Gold Foil Sheet to create two 2″ x 4-1/4″ pieces and one 1-1/2″ x 4-1/4″ piece.
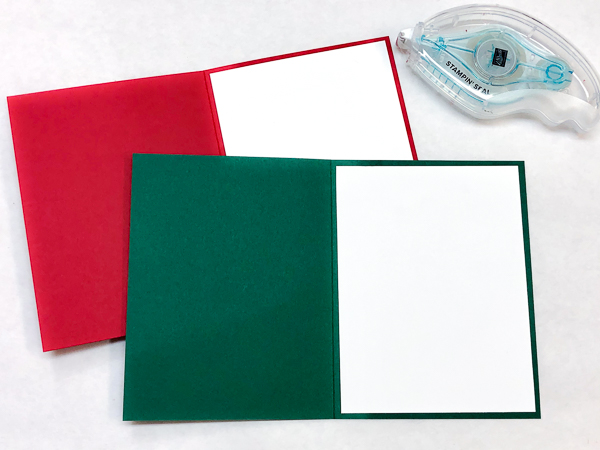 3. Add Inside LayersCut four 4″ x 5-1/5″ pieces of Whisper White cardstock. Adhere one inside each Real Red and Shaded Spruce card as a writing area.
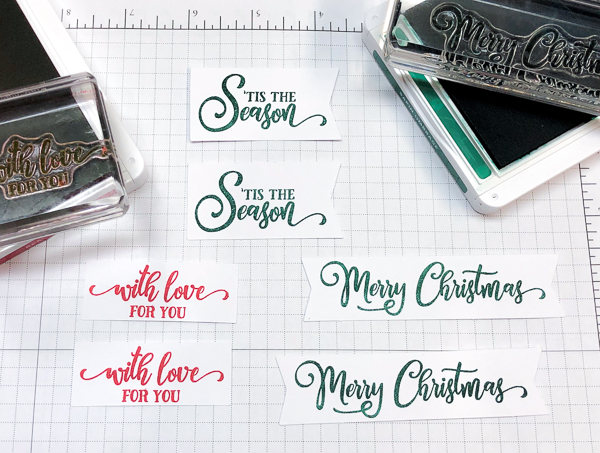 4. Stamp GreetingsStamp greetings from the Tag Buffet stamp set onto the tag labels as shown using Real Red and Shaded Spruce ink.
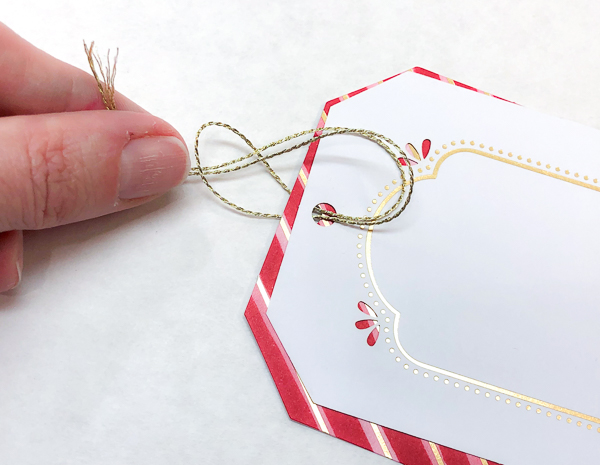 5. Add Gold TrimCut 6 pieces of Gold Trim to 8″ each. Stack the 2 tag layers for each tag with the holes aligned. Fold trim in half and thread folded end through the holes. Thread the trim ends through the loop in the trim and pull snug.
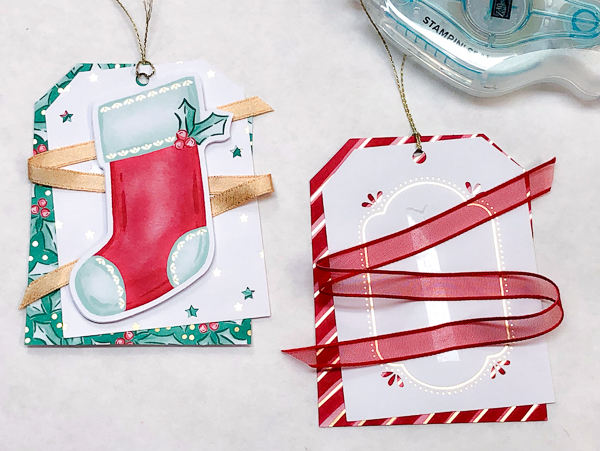 6. Add Ribbon Zig ZagFor the stocking and tree tags, cut 12″ piece of the Gold Shimmer and Real Red Sheer ribbons. Add a stripe of Stampin’ SEAL down the center of the white tag layer. Lay the ribbon across the tag in a zig zag starting at the top right and ending at the bottom left.
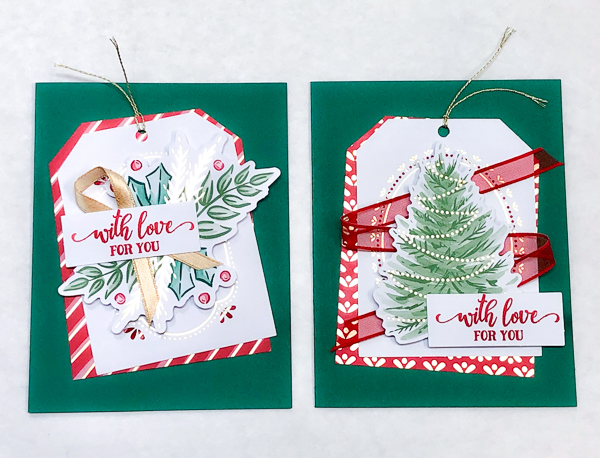 7. Shaded Spruce CardsGather the Shaded Spruce cards. Add the tags at an angle using Stampin’ Seal. Add the greenery and tree images with Stampin’ Dimensionals. Use 6″ of Gold Shimmer ribbon to create a crossed ribbon. Adhere to card with Glue Dots. Add greetings to both cards.
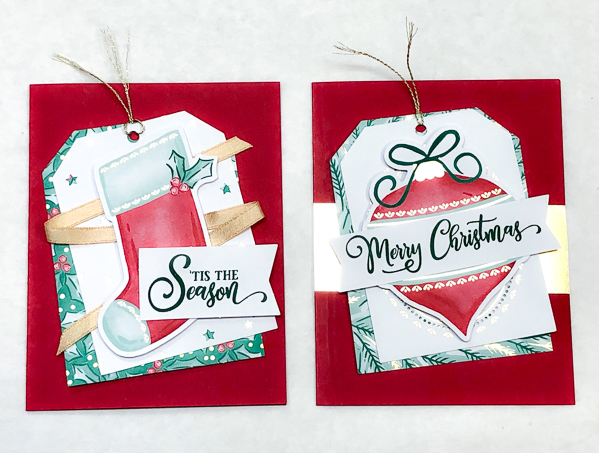 8. Real Red CardsGather the Real Red cards. Adhere the 1-1/2″ x 4-1/4″ Gold Foil strip across one. Add the tags at an angle using Stampin’ Seal. Add the stocking over the ribbon zig zag and the ornament to the other with Stampin’ Dimensionals. Add greetings to both cards.
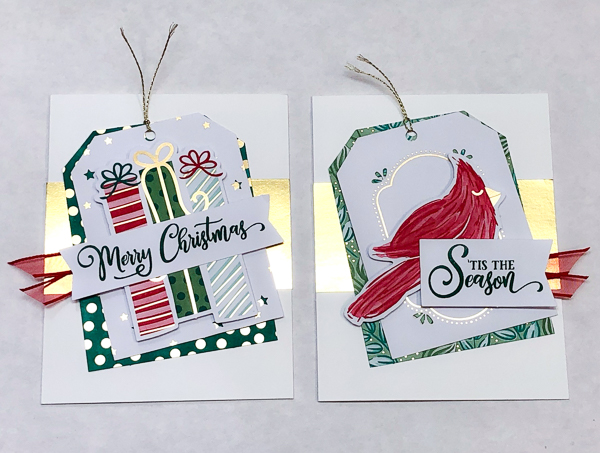 9. Whisper White CardsGather the Whisper White cards. Adhere a 2″ x 4-1/4″ Gold Foil strip across each one. Add the tags at an angle using Stampin’ Seal. Add the cardinal and gifts with Stampin’ Dimensionals. Cut two 4″ pieces of Real Red Sheer ribbon. Fold in a “V” and adhere behind one of of each greeting label with Glue Dots. Add greetings to both cards.Supplies